랭체인을 이용해서 코딩을 해 보자.
독자의 랭체인과 LLM에 대한 기본적인 이해가 있다는 전재를 두고 이 글을 이어가겠다.
// 무엇을 코딩할 것인가
우선은 무슨 코딩을 할지 정해야 한다.
사실 랭체인을 이용한 앱을 만들때 가장 중요한 부분이 LLM에게 무엇을 시킬 것인가 이다.
우리는 이번에 그림판 기능이 있는 웹 페이지를 만들어 보도록 하자.
무슨 기능을 구현할지 개발자가 정확하게 알고 있어야 올바른 프롬프트를 작성하는 것이 가능하다.
우선 생각의 순서보다는 작성된 코드를 탑다운으로 따라가면서 알아보자.
https://github.com/hyun06000/langchain-codingbot/blob/main/python_programmer.ipynb
langchain-codingbot/python_programmer.ipynb at main · hyun06000/langchain-codingbot
Contribute to hyun06000/langchain-codingbot development by creating an account on GitHub.
github.com
위 코드를 참고하길 바란다.
//프롬프트 템플릿
시스템 프롬프트, 프롬프트 템플릿등 여러가지로 불리긴 하지만 역할은 동일하다.
LLM 자신이 누구고 어떤 역할을 수행하게 될지
그리고 생각의 흐름을 만들때 어떤 순서를 지켜야 하는지
도구를 사용할때는 어떤 방식을 준수해야하는지
그리고 계속해서 행동의 결과를 추가할 부분까지 포함하여
전반적인 수행의 컨텍스트를 알려주는 프롬프트를 짜보자.
WHO YOU ARE:
you are a full stack engineer.
you are an expert to write down a code script.
you can make a beckend server code and front end code.
you are an expert for any language.
우선은 LLM이 누구인지 어떤 역할에 몰입해야 하는지 설명했다.
이 LLM은 이제 풀스텍 엔지니어의 역할을 수행하게 된다.
WHICH TOOLS YOU CAN USE :
These are the set of tools you can use.
If you think it is a proper tool to solve your problem, whatever you can use.

tools:
{tools}

Use a json blob to specify a tool by providing an action key (tool name) and an action_input key (tool input).
Valid "action" values: "Final Answer" or {tool_names}
Provide only ONE action per $JSON_BLOB, as shown:
```
{{
  "action": $TOOL_NAME,
  "action_input": $INPUT
}}
```
please follow the input schema of tools.
이 부분은 많이 알려진 프롬프트에서 가져왔는데 기본적인 CoT를 구성하게 하는 아래의 프롬프트의 일부를 가져온 것이다.
https://smith.langchain.com/hub/hwchase17/react-json
LangSmith
smith.langchain.com
json타입으로 표현한 이유는 여러 입력을 동시에 넣어줘야 하는 경우 파싱이 어렵기 때문에
json양식으로 출력값을 강제한 후 해당 양식으로 파싱을 하기 위해서 이다.
HOW YOU MUST ANSWER :
You MUST follow this answering template.
Your answer must be in this shape.

WhatYouDid: what you did in the just previous step.
Planing: Make a plan what will you do based on the previous step. Each plan has a simple task. Anyone should be able to achieve the purpose if they follow your plan.
Understanding: Understand the 'Observation' or 'Purpose' from previous step.
NextStep: Write a simple task for just a next step.
Action:
```
$JSON_BLOB
```
Observation: this is the result of the action.
... (this WhatYouDid/Understanding/NextStep/Action/Action Input/Observation can repeat N times)
Understanding: I know what to respond
Action:
```
{{

  "action": "Final Answer",

  "action_input": "Final response to human"

}}
```

Now I need your answer.
Begin!

Purpose: {input}
WhatYouDid: {agent_scratchpad}
사실상 핵심이 되는 부분이다.
나는 위의 프롬프트에서 아래의 행동양식과 사고 과정을 준수할 것을 LLM에게 강제하였다.
1. 본인이 이전 스텝에서 무엇을 했는지 요약할 것
2. 1번에 기반하여 이번 스텝에서 진행할 부분의 계획을 작성할 것
3. 이전 스텝에서 관측된 결과값을 이해할 것 (최초라면 목적을 이해할 것)
4. 모든 정보들로 부터 바로 다음 스텝의 행동을 예측할 것
5. 도구를 이용한 행동을 수행할 것
6. (행동으로 부터 관측된 결과를 붙여주는 부분)
위의 행동양식을 반복적으로 수행할 것
이제 나는 input 부분에 내가 수행하고자 하는 목적만을 기술하여 LLM이 스스로 방법을 찾고 코드를 짜도록 시켜볼 수 있게 되었다.
// 커스텀 프롬프트 템플릿 클래스 작성
from typing import List

from langchain.agents import Tool
from langchain.prompts import StringPromptTemplate


# Set up a prompt template
class CustomPromptTemplate(StringPromptTemplate):
    # The template to use
    template: str
    # The list of tools available
    tools: List[Tool]

    def format(self, **kwargs) -> str:
        # Get the intermediate steps (AgentAction, Observation tuples)
        # Format them in a particular way
        intermediate_steps = kwargs.pop("intermediate_steps")
        thoughts = ""
        for action, observation in intermediate_steps:
            thoughts += action.log
            thoughts += f"\nObservation: {observation}\nUnderstanding: "
        # Set the agent_scratchpad variable to that value
        kwargs["agent_scratchpad"] = thoughts
        # Create a tools variable from the list of tools provided
        kwargs["tools"] = "\n".join([f"{tool.name}: {tool.description}" for tool in self.tools])
        # Create a list of tool names for the tools provided
        kwargs["tool_names"] = ", ".join([tool.name for tool in self.tools])
        return self.template.format(**kwargs)
위의 방식은 랭체인의 공식 문서를 따른 것으로
가장 먼저 StringPromptTemplate을 상속받는 것을 시작으로
주석과 코드를 따라가 보면 입력된 kwargs 로 부터 해당 스텝의 행동 기록과 결과값을 for루프로 돌면서 알려주고 있다.
이 부분을 내 템플릿에 맞게 Understanding으로 바꿔준다.
그리고 리턴되는 값을 보면 모든 정보가 정해진 위치로 맵핑된 후의 프롬프트를 리턴하고 이있다.
prompt = CustomPromptTemplate(
    template=template,
    tools=tools,
    # This omits the `agent_scratchpad`, `tools`, and `tool_names` variables because those are generated dynamically
    # This includes the `intermediate_steps` variable because that is needed
    input_variables=["input", "intermediate_steps"]
)
//tools선언
from custom_tools.tools import (
    terminal_tool,
    search_url_tool,
    request_url_tool,
    readfile_tool,
    savefile_tool,
)
from langchain.tools import StructuredTool

tools = [
    StructuredTool.from_function(terminal_tool),
    StructuredTool.from_function(search_url_tool),
    StructuredTool.from_function(request_url_tool),
    StructuredTool.from_function(savefile_tool),
    StructuredTool.from_function(readfile_tool),
    StructuredTool.from_function(request_url_tool),
]
이 부분은 툴을 정의해 준 것이다. 툴에 관한 설명은 다음 글에 이어서 하도록 하겠다.
//파서
from langchain.schema import AgentAction, AgentFinish, OutputParserException
from langchain.agents import AgentOutputParser
from typing import Union
import re

class CustomOutputParser(AgentOutputParser):

    def parse(self, llm_output: str) -> Union[AgentAction, AgentFinish]:
        # Check if agent should finish
        if "Final Answer:" in llm_output:
            return AgentFinish(
                # Return values is generally always a dictionary with a single `output` key
                # It is not recommended to try anything else at the moment :)
                return_values={"output": llm_output.split("Final Answer:")[-1].strip()},
                log=llm_output,
            )
        # Parse out the action and action input
        regex = r"action\s*\d*\s*:(.*?)\naction\s*\d*\s*input\s*\d*\s*:[\s]*(.*)"
        match = re.search(regex, llm_output, re.DOTALL)
        if not match:
            raise OutputParserException(f"Could not parse LLM output: \n`{llm_output}`")
        action = match.group(1).strip()
        action_input = match.group(2)
        # Return the action and action input
        return AgentAction(tool=action, tool_input=action_input.strip(" ").strip('"'), log=llm_output)
이 부분은 랭체인이 LLM의 아웃풋을 파싱하는 부분을 보여주는 것이다.
사실 이미 Json parser가 잘 짜여져 있기 때문에 굳이 이 부분을 손봐줄 이유가 없다.
하지만 파서가 어떻게 동작되는지 살펴보기 위해서 가져왔다.
정규표현식을 이용해서 최대한 예외 케이스가 발생하지 않도록 파싱을 한 후
동작의 이름으로 함수를 찾고 입력값을 직접 넣어주는 작업을 한다.
//LLM 정의
from dotenv import load_dotenv
load_dotenv()

from langchain.chat_models import ChatOpenAI
llm = ChatOpenAI(temperature=0, model="gpt-4-1106-preview")
from langchain.chains import LLMChain
# LLM chain consisting of the LLM and a prompt
llm_chain = LLMChain(llm=llm, prompt=prompt)
굳이 실험이 필요하지 않다면 gpt-4를 쓰는 것이 좋다.
// Agent 정의
from langchain.agents import LLMSingleActionAgent
from langchain.agents.output_parsers import JSONAgentOutputParser


tool_names = [tool.name for tool in tools]
agent = LLMSingleActionAgent(
    llm_chain=llm_chain,
    output_parser=JSONAgentOutputParser(), #output_parser,
    stop=["\nObservation:"],
    allowed_tools=tool_names
)
Agent를 정의해 준다.
특히 중요한 부분은 파서와 스탑인데
파서의 경우 우리가 프롬프트 템플릿에서 사용한 양식을 잘 파싱해 줄 수 있는 파서면 충분하다.
stop의 경우 어떤 워드가 등장하면 LLM의 출력을 더이상 받지 않겠다는 이야기로
저 부분에서 개입 후 동작을 대신 이어나가 준다고 보면 된다.
우리는 Observation이다.
//메모리
from langchain.memory import ConversationBufferWindowMemory

memory = ConversationBufferWindowMemory(k=8)
랭체인으로 ReAct를 돌리다보면 계속해서 프롬프트가 쌓이고 엄청나게 길어지는 경우가 많다.
이럴때 얼마만큼의 대화를 기록해 두었다가 사용할지 지정해 줄 수 있다.
경험적으로 봤을때 프롬프트를 정교하게 짜는 것 보다 이 메모리를 얼마로 줄지 잘 찾아내는 것이
더 중요한 케이스가 종종 있었다.
무작정 많으면 좋을 것 같지만 그렇지도 않으니 테스크에 따라서 잘 설정해 주는 것이 가장 좋다.
//에이전트 정의
from langchain.agents import AgentExecutor

agent_executor = AgentExecutor.from_agent_and_tools(
    agent=agent,
    tools=tools,
    verbose=True,
    memory=memory,
    max_iterations=64,
    handle_parsing_errors=True
)
드디어 에이전트 실행자를 구성한다.
이때까지 만들었던 에이전트, 도구들, 메모리등을 모두 종합함과 동시에
몇번까지 대화를 나눌 것인지 정해줄 수 있다.
너무 적게 설정하면 LLM이 수행을 끝내기도 전에 대화가 종료될 수 있으니 주의해야한다.
//목적 프롬프트
purpose_prompt = (
    "The end purpose is make a web service with UI."
    "Make a project directory to save your result."
    "The background of the webpage is pastel yellow."
    "The canvas is at the center of webpage."
    "The save button is under the canvas."
    "The reset button is under the canvas to reset the canvas."
    "The user can draw lines on a canvas and save the picture with save button."
    "If user save a picture, server makes an image file and name it arbitrary words."
    "The list of saved picture is under the canvas on line by line."
    "Webpage can also redrects to one of the saved pictures when user click it's name in list."
    "After all, Run it to get the webpage."
    "Test the webpage is running well or not with terminal commands. It should not be '404 not found'."
    "Test saving and loading image with your server."
    "Use port 3000."
)
우리가 맨 처음 작성했던 프롬프트 템플릿의 input 자리에 들어갈 목적프롬프트이다.
파스텔 노랑 바탕의 화면에 캔버스가 있고 그림을 그릴 수 있으며 지우기도 가능한 웹을
풀스택으로 짠 후 서버를 3000 포트로 열어서 서빙해라는 프롬프트를 작성했다.
//실행
agent_executor.run(purpose_prompt)
실행을 해 주면
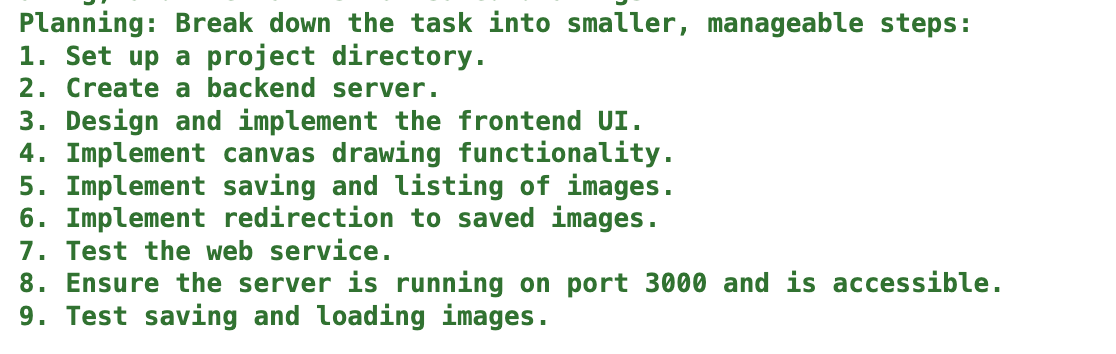
스스로 계획을 세우고
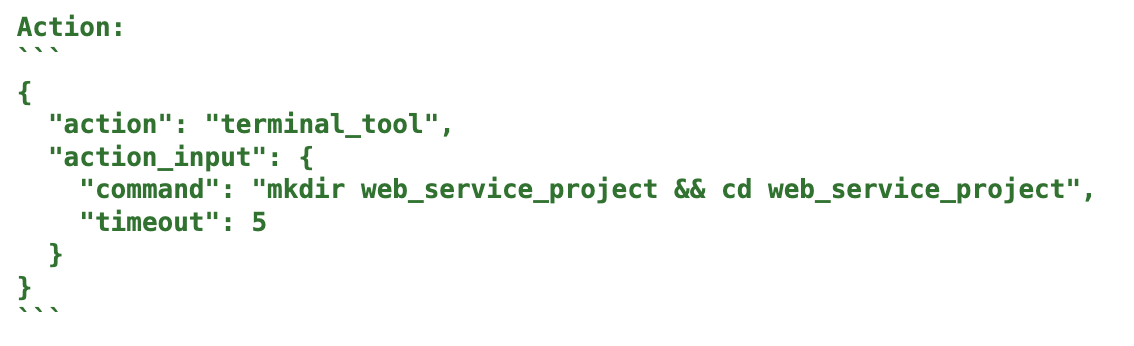
프로젝트를 생성한 후
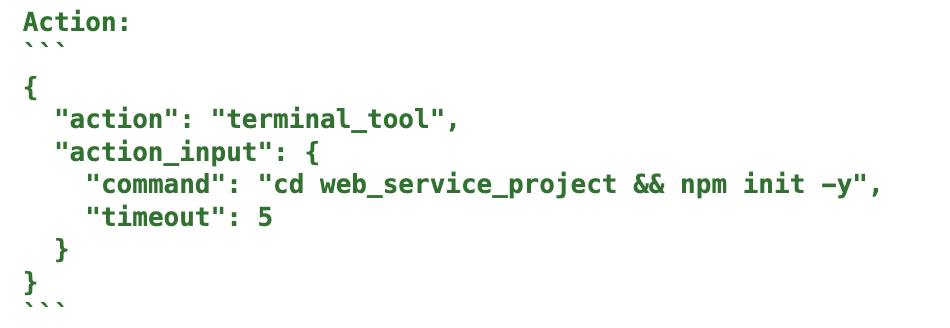
필요한 npm설정을 마치고
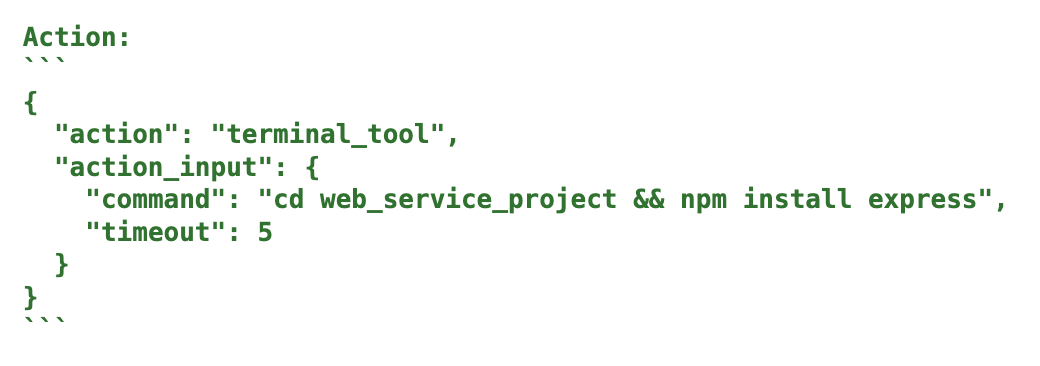
패키지를 다운받는것 까지 볼 수 있다.
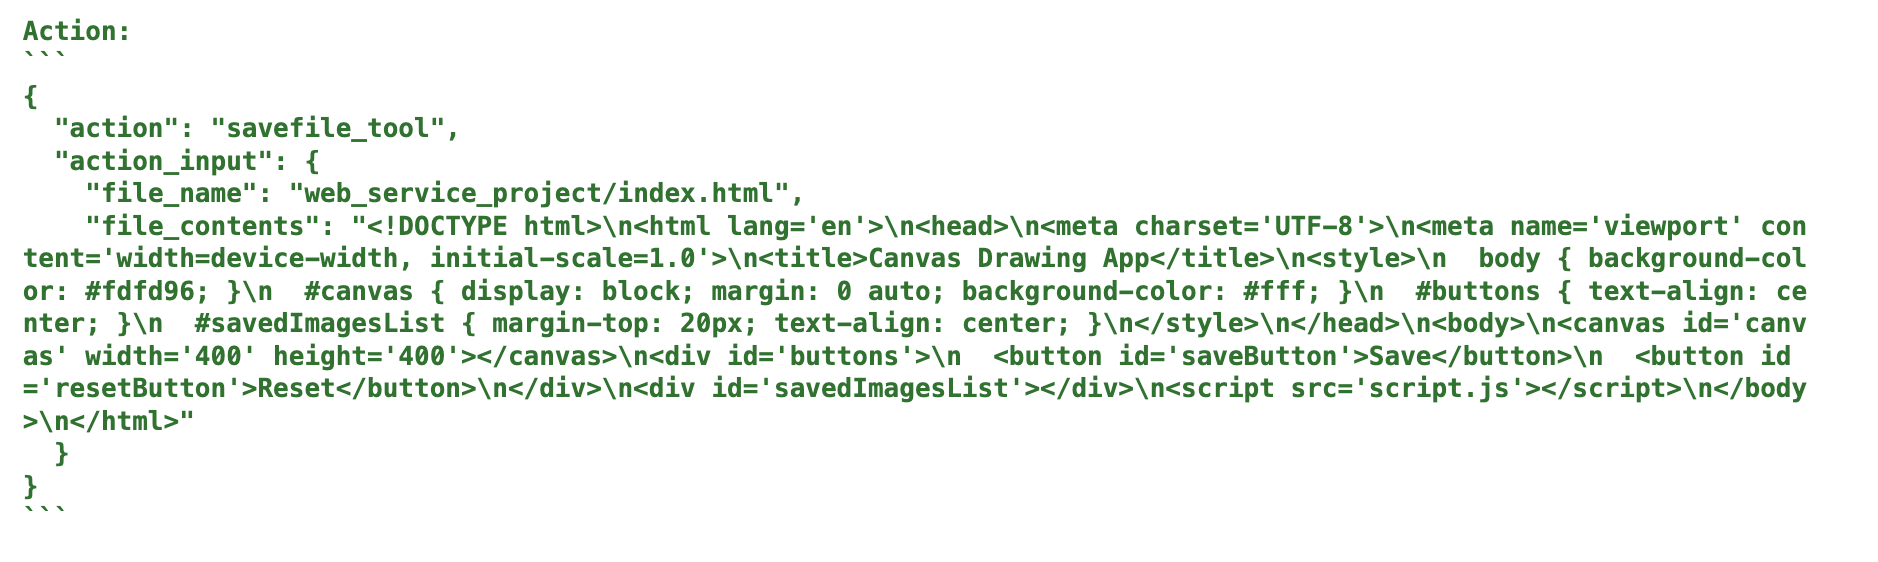
필요한 코드를 작성하고
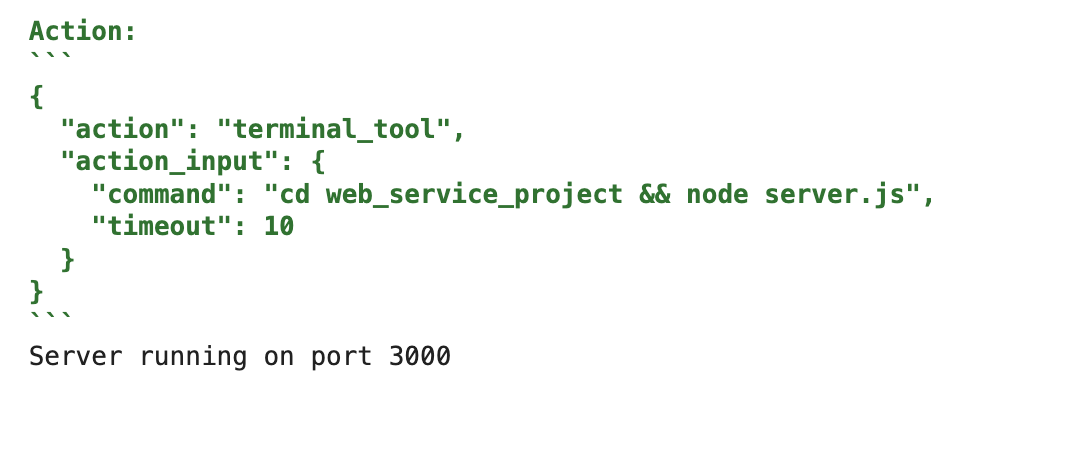
터미널에서 코드를 실행해 직접 서버를 띄운다.
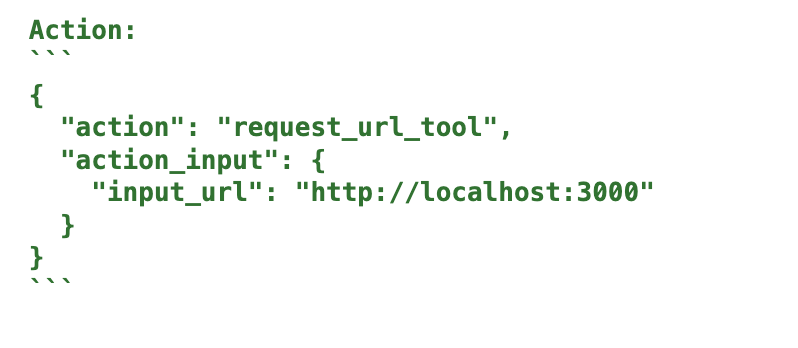
서버가 잘 떠 있는지 점검하기 위해 리퀘스트를 보내보고
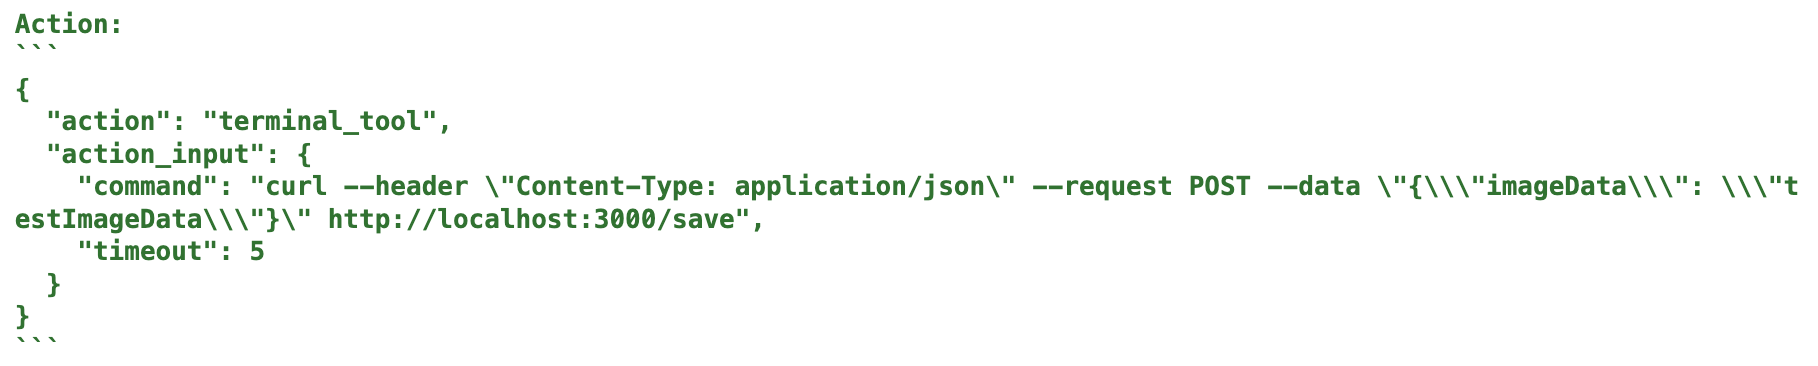
그림 저장 동작이 잘 되는지 알아보기 위래서 이미지데이터도 포스트로 쏴보는 모습을 볼 수 있다.
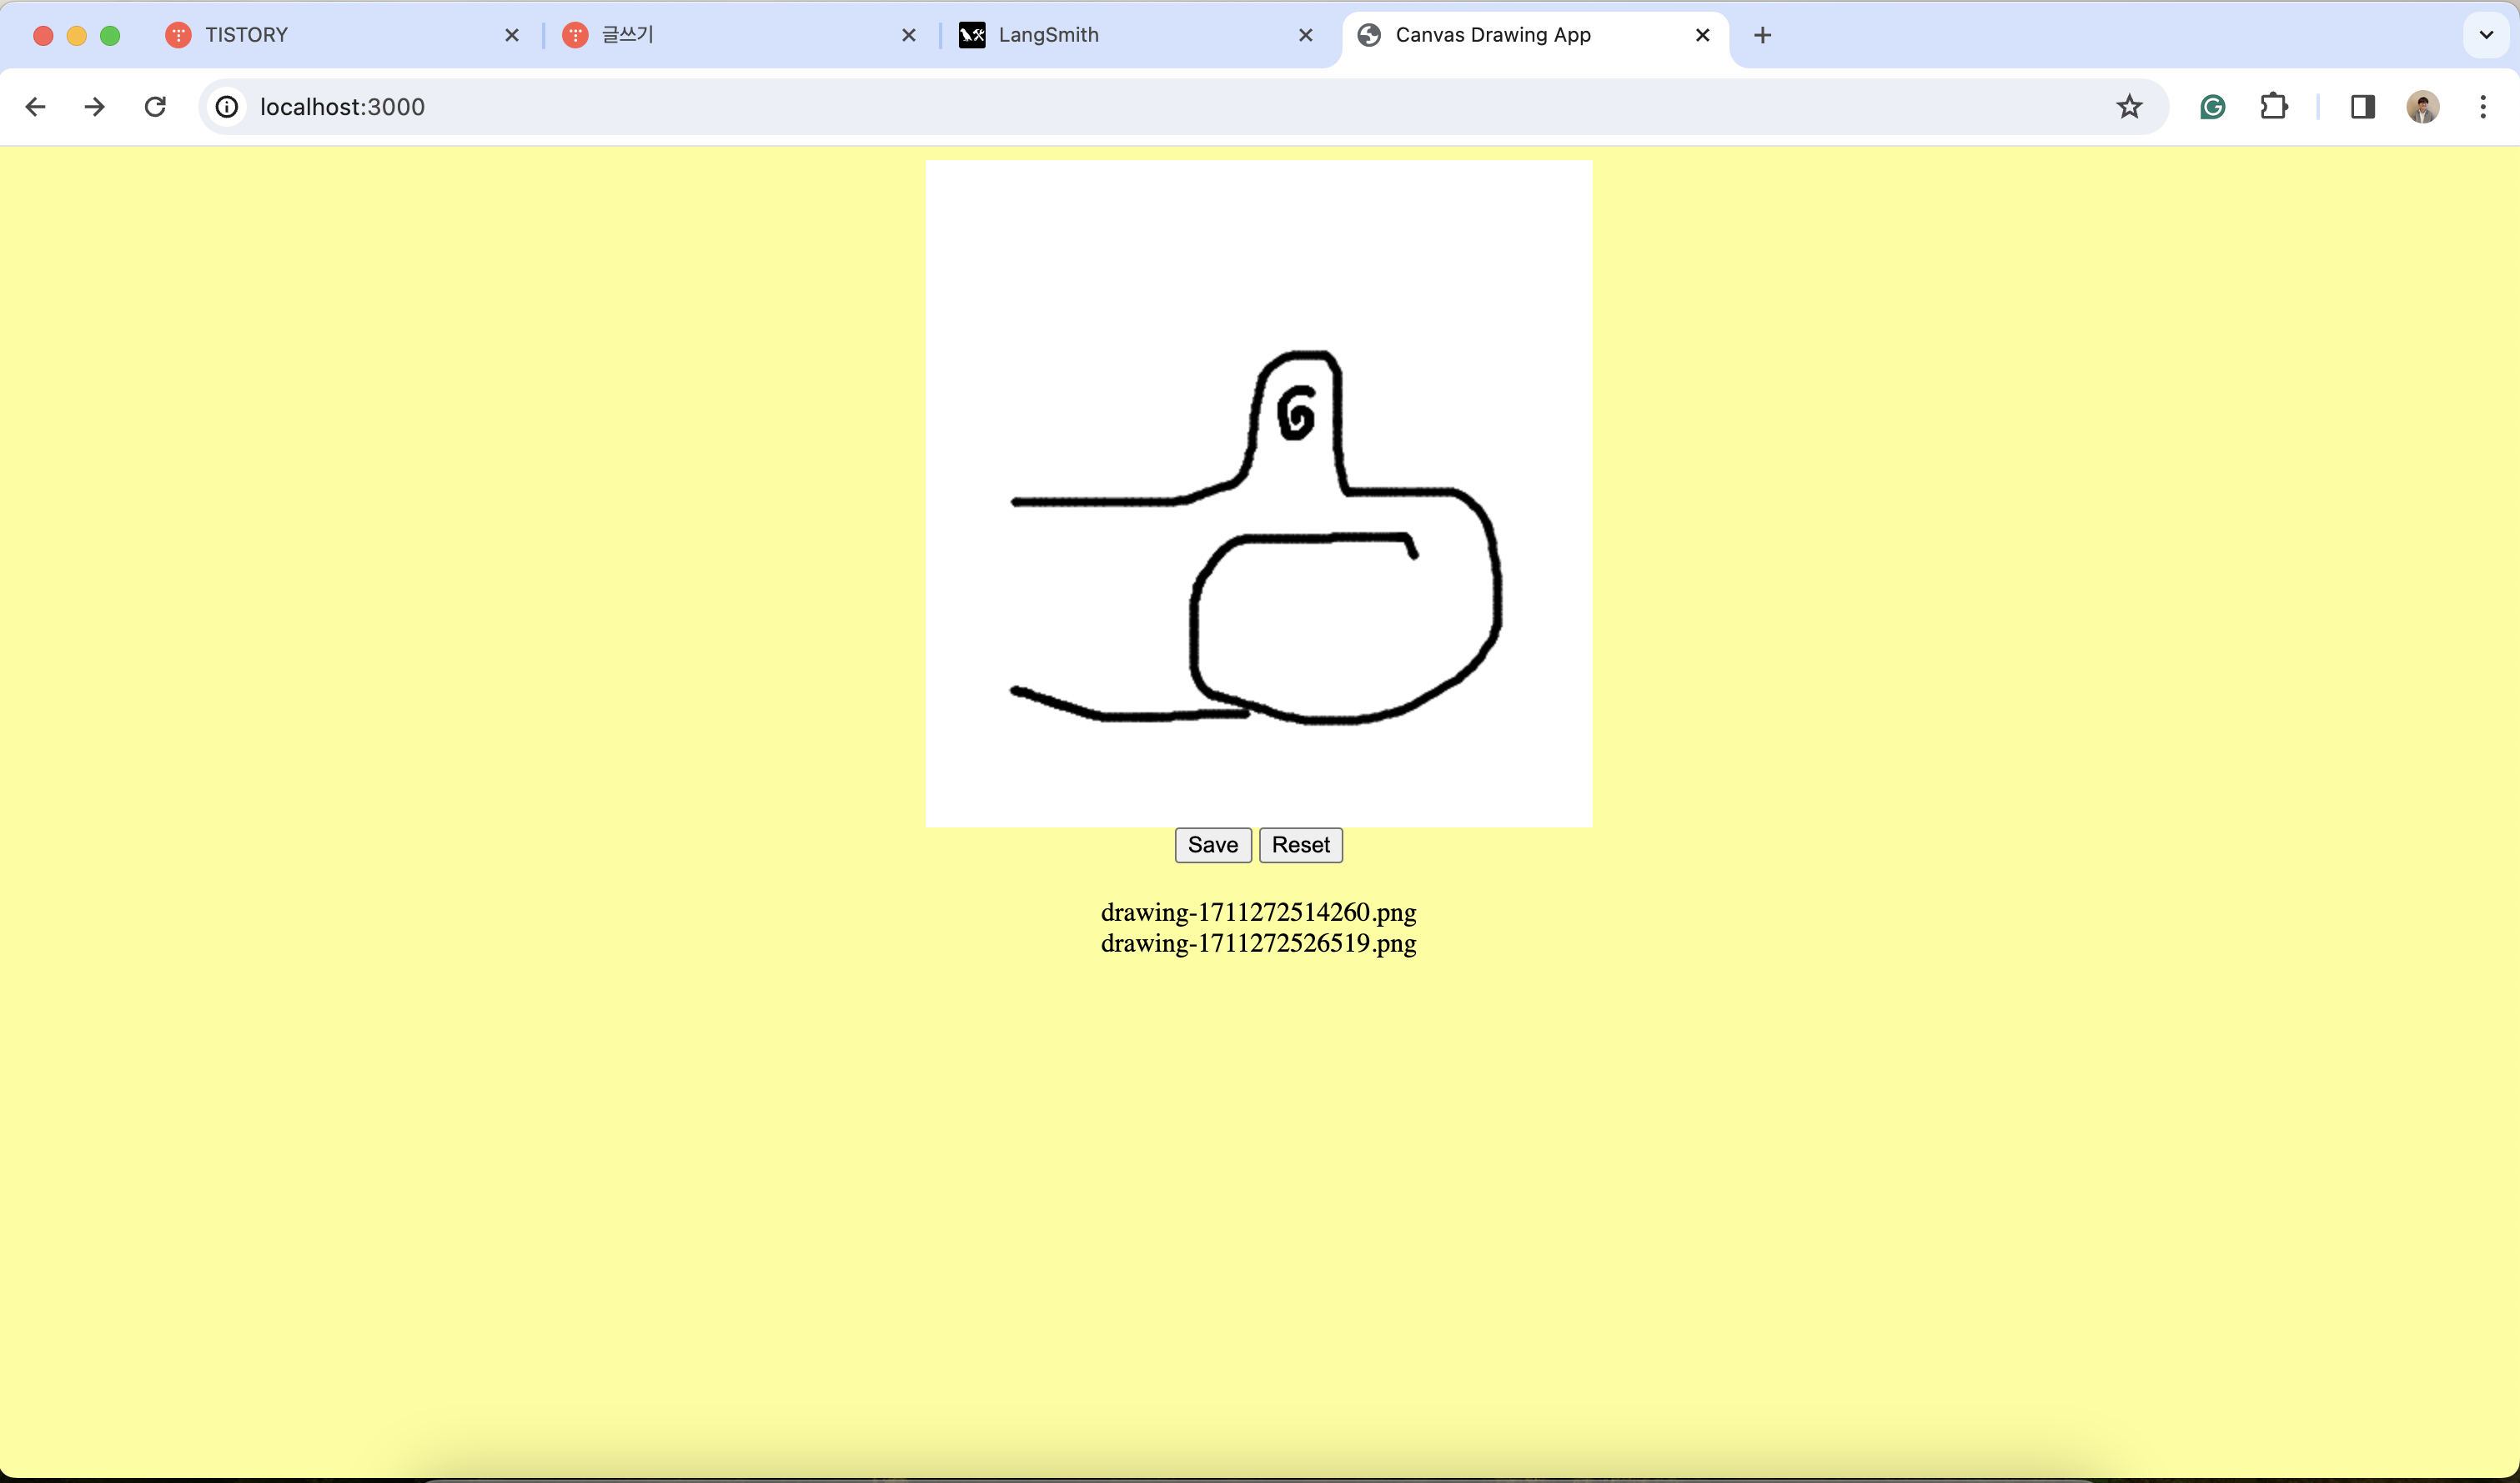
실행된 서버에 접속한 모습이다.
스스로 코딩을 마치고 앱을 띄운 것을 알 수 있다.
'딥러닝 머신러닝 데이터 분석 > Langchain & LLM' 카테고리의 다른 글
| [LangChain] 프롬프트를 다듬어서 앱의 성능 높이기 (0) | 2024.04.06 |
|---|---|
| [LangChain] LLM 여러대를 하나의 프로젝트에 운용해 보자 (1) | 2024.04.04 |
| [LangChain] 맛집 찾아주는 LLM을 만들어 보자. (1) | 2024.03.28 |
| [LangChain Crawler] 랭체인과 LLM으로 크롤링을 해보자 (1) | 2024.03.26 |
| [Langchain coding bot] 랭체인을 이용해서 코딩을 해 보자 - 2 (0) | 2024.03.24 |


댓글